Common Mistakes to Avoid When Using Glass Block Mortar Mix
Using glass block mortar mix correctly can transform your project, enhancing both beauty and functionality. Whether you’re building a stunning glass block wall or creating a unique architectural feature, knowing common mistakes can save you time and money. This guide covers essential aspects of glass block mortar, helping you avoid pitfalls that could harm your project.
Understanding Glass Block Mortar Mix: The Basics
What Is Glass Block Mortar?
Glass block mortar is a special blend designed to bond glass blocks securely. Unlike regular mortar, which may struggle to stick to glass’s smooth surfaces, this mix often includes additives that enhance adhesion and flexibility. Choosing the correct mortar type for your project is crucial to ensure durability and visual appeal.
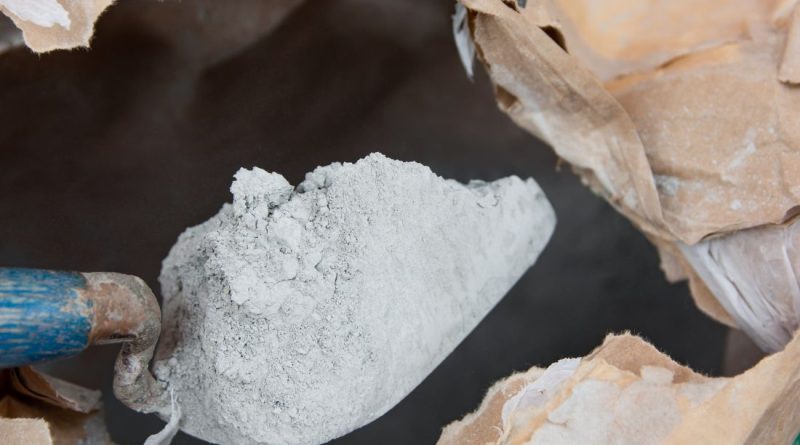
Composition of Quikrete Glass Block Mortar
Typically, Quikrete glass block mortar contains Portland cement, sand, and various additives. These components work together to create a mixture that adheres well to glass surfaces while allowing slight movement without cracking. Understanding the composition is vital as it affects how the mortar performs during application and over time.
Benefits of Using Glass Block Mortar Mix
Using a specialized glass block mortar mix offers several advantages:
- Enhanced Adhesion: Designed specifically for glass, it bonds better than standard mortar.
- Flexibility: Accommodates slight movements, reducing the risk of cracks.
- Water Resistance: Protects against moisture, crucial for outdoor projects.
- Clarity: Maintains the aesthetic quality of glass blocks, ensuring the beauty of your installation shines.
Choosing the Right Type of Glass Block Mortar Mix
Factors to Consider
When selecting a glass block mortar mix, consider:
- Project Type: Indoor or outdoor use may dictate the mortar type. Outdoor projects need a mix that withstands elements.
- Climate Conditions: Extreme temperatures may require a more flexible and durable mix.
- Block Size and Thickness: Larger or thicker blocks might need different mortar formulations for proper support and adhesion.
Available Options
Various brands offer glass block mortar mixes, including Quikrete. When choosing a product, think about:
- Standard Mixes: Ideal for general use, suitable for most installations.
- Quick-Setting Mixes: Perfect for projects needing rapid curing times.
- Specialty Mixes: Designed for unique applications, such as heavy-duty installations or artistic designs.
Product Recommendations
For best results, consider:
- Quikrete Glass Block Mortar: Known for reliability and ease of use, this mix suits both DIYers and professionals. Many users have reported excellent results when using this product for both indoor and outdoor projects.
- Custom Building Products Glass Block Mortar: Offers high adhesion and flexibility, suitable for various conditions.
Common Mixing Errors and How to Avoid Them
Incorrect Ratios
One common mistake is not following the proper mixing ratios. Manufacturer instructions should always be followed, as incorrect ratios can lead to weak mortar that doesn’t stick well.
Solution
- Use a Measuring Tool: Measure ingredients accurately.
- Mix Small Batches: Start with smaller amounts to practice your mixing technique.
Inconsistent Mixing
Inconsistent mixing can create clumps or uneven texture in the mortar, affecting strength and adhesion.
Solution
- Use a Power Mixer: For large quantities, a power mixer can ensure uniform consistency.
- Mix Thoroughly: Blend all components evenly, breaking up any clumps.
Not Checking the Water Content
Many DIYers underestimate the importance of water content. Too much water weakens the mortar, while too little makes it hard to apply.
Solution
- Follow Manufacturer Guidelines: Refer to product instructions for the correct water-to-mortar ratio.
- Test Consistency: Aim for a workable consistency, similar to peanut butter.
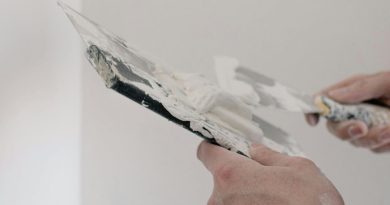
The Importance of Proper Application Techniques
Using the Right Tools
To achieve the best results with glass block mortar mix, using the right tools is crucial. Common tools include:
- Trowels: For spreading and shaping the mortar.
- Level: To ensure blocks are installed evenly.
- Mortar Gun: For precise application in tight spaces.
Application Techniques
Proper application techniques can significantly affect durability and appearance.
Layering
- Apply in Layers: For large installations, apply mortar in layers for better control and adherence.
- Use Spacers: Incorporate spacers between blocks to maintain consistent gaps for grout.
Troweling
- Use Correct Technique: Hold the trowel at a 45-degree angle for even spreading.
- Smooth Edges: After placing each block, smooth the edges for a cleaner finish.
Avoiding Common Application Mistakes
- Rushing the Process: Take your time to ensure each block is placed correctly.
- Ignoring Temperature Conditions: Extreme temperatures can affect the application; work in moderate conditions when possible.
Mistakes in Curing Time: Why It Matters
Understanding Curing Time
Curing time is the period during which the mortar sets and gains strength. Many DIYers underestimate this phase, which can lead to future structural issues. According to industry experts, proper curing is essential for achieving the maximum strength of the mortar.
Common Curing Mistakes
- Removing Supports Too Soon: If you remove temporary supports before the mortar has fully cured, it can cause sagging or uneven walls.
- Inadequate Moisture: Mortar requires moisture to cure properly. Without it, the curing process can stall, weakening the final product.
Best Practices for Curing
- Follow Instructions: Check the manufacturer’s recommendations for curing times.
- Maintain Moisture Levels: Keep the mortar damp, especially in dry conditions, to ensure proper curing.
- Avoid Stress: Do not place weight on the blocks until the mortar has fully set.
DIY vs Professional Installation: What You Should Know
When to Choose DIY
DIY installation can be fulfilling, especially if you have some construction knowledge. Consider DIY if:
- You Have Experience: If you have prior experience with similar projects, you may be comfortable with a glass block installation. For example, I once tackled a small glass block window project, which turned out to be a rewarding experience with the right preparation.
- Budget Constraints: DIY can save money, allowing you to allocate funds for other project aspects.
When to Hire a Professional
Hiring a professional may be better if:
- Lack of Experience: If you’re unfamiliar with glass block installations, a professional can ensure the job is done correctly.
- Complex Designs: Unique or complicated designs often require a skilled installer’s expertise. An expert can easily navigate the challenges that come with intricate patterns.
Pros and Cons
| Aspect | DIY | Professional Installation |
| Cost | Generally lower | Higher initial investment |
| Time | Can take longer | Usually quicker |
| Quality | Variable, depending on skill level | Typically higher |
| Control | Full control over the process | Less control |
Troubleshooting Common Issues with Glass Block Installations
Cracking in Mortar Joints
Cracking may occur if the mortar mix was too dry or if the installation faced stress before curing. To troubleshoot:
- Assess the Installation: Check for signs of improper installation or stress points.
- Repair Cracks: Use a compatible repair mortar to fill in cracks and ensure a smooth finish.
Poor Adhesion
If glass blocks do not adhere properly, it may be due to:
- Incorrect Mixing: Review your mixing process to ensure proper ratios and consistency.
- Surface Preparation: Ensure the surfaces of the glass blocks and substrate are clean and free of debris. For example, I once noticed that a simple wipe down of the surfaces significantly improved adhesion during a project.
Water Infiltration
Water infiltration can damage your installation over time, leading to mold and structural issues. To address this:
- Sealant Application: Apply a waterproof sealant to protect against moisture.
- Check Drainage: Ensure that any water can drain away from the installation to prevent pooling.
Uneven Surfaces
If glass blocks appear uneven, inspect the installation for:
- Leveling Issues: Use a level during application to ensure blocks are placed evenly.
- Mortar Thickness: Ensure the mortar was applied evenly across all blocks.
| Common Mistakes | Description | Solutions/Best Practices |
| Incorrect Ratios | Not following the proper mixing ratios can weaken the mortar. | Use a measuring tool and mix small batches. |
| Inconsistent Mixing | Clumps or uneven texture can affect strength and adhesion. | Use a power mixer for large quantities and mix thoroughly. |
| Not Checking Water Content | Too much or too little water can weaken the mortar or make it hard to apply. | Follow manufacturer guidelines and test for consistency. |
| Rushing the Process | Hurrying can lead to misalignment and poor adhesion. | Take your time to ensure proper placement of each block. |
| Ignoring Temperature | Extreme temperatures can affect the curing and application of the mortar. | Work in moderate conditions and adjust your methods accordingly. |
| Removing Supports Too Soon | Premature removal of supports can lead to sagging or uneven walls. | Wait for the mortar to fully cure before removing supports. |
| Inadequate Moisture | Lack of moisture can stall the curing process and weaken the mortar. | Maintain moisture levels as per manufacturer recommendations. |
| Poor Surface Preparation | Dirty surfaces can lead to poor adhesion of mortar to glass blocks. | Ensure surfaces are clean and free of debris before installation. |
| Cracking in Mortar Joints | Can occur from a dry mix or stress before curing. | Assess installation, repair cracks with compatible mortar. |
| Water Infiltration | Can cause damage over time if not addressed. | Apply waterproof sealant and ensure proper drainage. |
Avoiding common mistakes when using glass block mortar mix leads to a successful and visually appealing installation. By understanding glass block mortar basics, choosing the right mix, and applying proper techniques, you can ensure your project lasts. Whether you choose DIY or hire a professional, being aware of potential pitfalls helps achieve the best results. Remember to maintain patience during curing and troubleshoot any issues promptly for a flawless finish.